Background of Pierogi Ruskie
Legend says Pierogi was brought to Poland by St. Jacek Odrowąż in the 13th century. It believed the method and style of the dumplings was inspired by Asian cuisine as a result of Mongol occupation in the area at the time. This specific (Pierogi Ruskie) recipe using Potatoes and cheese. Is recorded as originating from Red Ruthenia, Eastern Galicia (south-western Ukraine and south-eastern Poland) with no certain date of origin.
In Poland this recipe is known as Russian. However, Russian influence in the emergence of this recipe is impossible to find. Some could argue its a result of Russian presence in the 17th century. But Its more likely the name of this recipe, became mainly popular as a reminder. After Poland successfully defeated the Russian invasion of Europe in 1921. Given the majority of records on this specific recipe begin shortly before or after WW2.
Since the Russian invasion of Ukraine in 2022. There has been a large effort in Europe to rename the recipe to pierogi ukraińskie (Ukrainian Dumplings). As the area of Red Ruthenia is no longer Russian Territory. Many Poles are unhappy with this change, not because they favour Russia. Only because that specific region has been occupied by many countries over the last several centuries. Across the border, the Ukrainians themselves often refer to this recipe as Polish Pierogi. Potentially making room for some confusion in years to come.
This recipe is straightforward to do but takes some time and little patience. The usual yield for the below ingredients, is around 60 Pierogi. Combine that with the fact they freeze great, are very quick to cook and leave you feeling full. It makes the perfect easy meal after a busy day or interesting new addition to the weekly meal prep. My kids and their friends love these, so they’re also a brilliant, long lasting, preservative free, alternative to lunch or supper for parents.
Ingredients for Pierogi Ruskie
| For the Stuffing – 300g (10.5 oz) Full fat or Semi-Skimmed Cottage Cheese (preferably in cubes) – Around 300g (10.5 oz) of Onions – Around 700g (1.5 lbs) of All purpose potatoes – 2 Tablespoons of Cooking Oil – 1 Teaspoon of Salt & Pepper For the Dumpling Dough – 500g (1.1 lbs) of all purpose flour – 250ml (8.5 fl oz) of hot water – 50ml (1.7 fl oz) of Vegetable oil – 1/2 Teaspoon of salt |
Preparation for Pierogi Ruskie
- Peel the Potatoes
- Peel & chop the Onions
- Set the Cottage cheese out of the fridge
Dumpling Stuffing Method
Cook & Mash the Potatoes
Fill a Large pot with water, Place in the potatoes before adding salt and bring to the boil. To save you time, I recommend chopping the potato into thin slices around 1.5cm (1/2 inch) thick. This should cut the cooking time down to around 15-20 minutes on high heat.
The Potatoes are ready once they can be pierced with a folk without much effort. When they’re done, drain the pot and begin mashing them. When they are close to being fully mashed, add a Teaspoon of salt and pepper to season and continue until smooth.
Fry the Onion
Pre-heat a frying pan to Medium-high, with two Tablespoons of cooking oil. Before adding the Onion and frying for around 10 minutes or until golden brown. Once they’re done, set the onion aside to cool for a while.
Prepare the Cottage Cheese
Ideally you will be using cubed cottage cheese for this stage. That being said, I’ve been able to make bucket style cottage cheese to work too. But it usually requires to reduce the amount to around 200g (7oz) otherwise the potatoes become a little sloppy and easily escape the dough.
If you’re using cubed or hard cottage cheese. It will need to be softened first to mix properly combine with the potato. You can use a mixer with a suitable attachment, press it through a mesh sieve or use an immersion blender to soften it. Once your confident its reached an almost sandwich-spreadable consistency. It ready for mixing with the rest of the stuffing.
If you’re using the kind of cottage cheese that is in a bucket and is already soft, you can skip to the next stage.
Mix it Up
In a large mixing bowl, add the Potato, onions and Cottage cheese. Mix thoroughly until combined. Once done, we move to doing the dough.
Dumpling Dough Method
Make the Dough
In a large mixing bowl. Sift the 500g (1.1 lbs) of all purpose flour, before adding 1/2 teaspoon of salt, the 50ml of Vegetable oil (or another oil with neutral taste) and hot water.
Combine the contents of the bowl with a wooden spoon. Once it thickens, begin kneading it. Once its finished kneading, create a ball shape and wrap it in plastic kitchen wrap or aluminium foil. Set it aside for 30 minutes to rest before moving to the rolling stage.
Roll & Shape
Now the dough has rested for 30 minutes. unwrap the foil or plastic from the dough and cut it into 3 evenly sized pieces. Set two of these pieces to the side (cover them with a tea towel to prevent drying out) while you work with one for rolling.
Lightly sprinkle the surface of a pastry board or a countertop with flour and flatten the first piece of dough with a rolling pin until its thin. Next, preferably using a cooking cutter. Cut circles from the dough around 8cm (3 inches) in diameter. Once you have got as many circles from that piece of dough, you can combine the leftover dough from cutting, make a small ball with it and re-flatten to cut a few more.
Next we need to add the stuffing and shape the pierogi. I didn’t learn how to do this from words on a page, and I don’t expect you to. For that reason click on the below video to see the most simple method I found, for first time pierogi folding.
I recommend placing the shaped pierogi on a tray and covering with a tea towel to prevent them drying out. You should get a generous yield from this. I normally get around 60 Pierogi’s from this amount of ingredients. If you have no occasion that calls for 60 of them, just freeze the one’s you don’t need in suitable bags and they can last months.
Time to cook
Fill a large pot to around 3/4 full with water, add salt and bring to the boil. Once the water is boiling reduce the heat slightly to get a gentle simmer, as any violent water movement may break open the pierogi.
Carefully insert the pierogi into the water (I use a large flat metal spoon for this) and allow to cook for around 3-4 minutes. You can tell the Pierogi is ready as it should float to the surface around that timeframe.
Serving
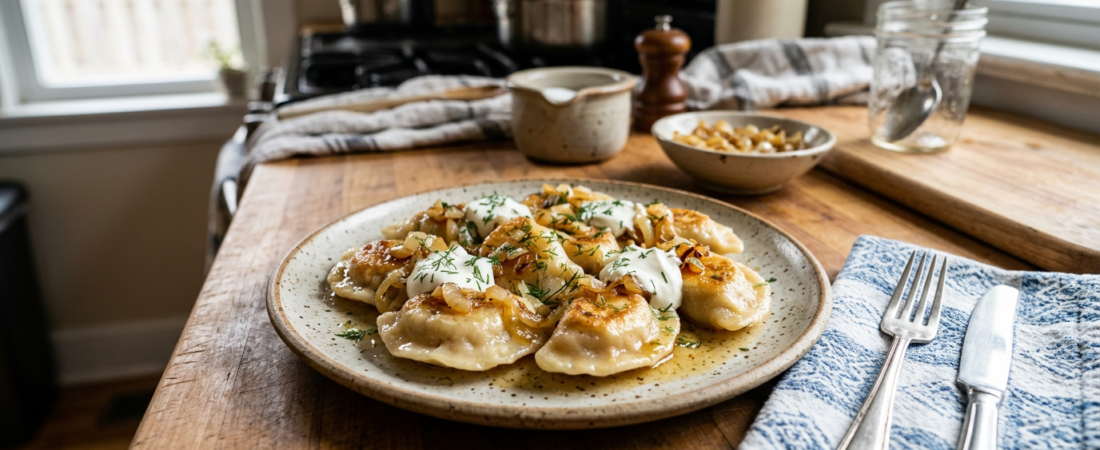
Pierogi are traditionally served as an independent dish, commonly they are covered with fried onions and/or bits of fried bacon.
Storing Pierogi Ruskie
I recommend freezing pierogi as your primary option. The dough freezes with the best results and least hassle when its raw/uncooked, after shaping them. The results are basically the same as fresh pierogi making them a fantastic addition to weekly meal preps or as quick backup meal.
Make sure to use dry freezer bags or freeze suitable containers as any moisture contact may cause expansion and crack the dough when freezing. To cook from frozen is the same method as cooking them from fresh, only the cooking time is extended to around 10-12 minutes or whenever they float to the surface of the water.
I don’t recommend cooking Pierogi in water before freezing, they will stick together even when covered in generous amounts of oil and they normally tear when separating due to the softened dough.
For leftover pierogi, If refrigerated within an hour of cooking, in an airtight food safe container. Then up to 3 days should be possible for storage. To reheat, pre-heat a frying pan with a Tablespoon of oil and cook on medium heat for around 5 minutes.