Background of Polish Devolay
Obviously chicken Devolay (Kiev’s) aren’t exactly of Polish origin. However, like many dishes of Slavic origin, Poles have a recipe of their own which is considered socially traditional. Specifically by adding the limitation of using only seasoned butter for the filling. That being said, many poles like to add a little cheese and mushrooms to increase the comfort factor in the winter months.
The one thing to love about this recipe is its simple ingredients, that can be found in any kitchen. Its straightforward method also avoids the need for blending or freezing things before frying, unlike some modern western recipes.
Devolay Ingredients
| – 4 Chicken Fillets, ideally around 150g (5oz) each – 80g (3oz) of butter – 3 Garlic cloves – 30g (1oz) of chopped parsley – Quarter (1/4) teaspoon of Ground Pepper – Half (1/2) a teaspoon of salt For the coating – 6 Tablespoons of breadcrumbs – 3 Tablespoons of plain flour – 2 Large eggs For Frying – 500ml (17 fl oz) of cooking oil |
Preparation for Chicken Devolay
- For the coating, lay out three shallow bowls. Adding flour to the first one, breadcrumbs to the second and beaten eggs to the third.
- Leave the butter out of the fridge for at least 10 minutes to soften, before hand mixing.
- Crush or finely chop the garlic cloves.
- Chop the parsley.
- Prepare the herb butter (See method for more info).
- Hammer the chicken breasts (See method for more info).
Method
Mixing the herb butter
First we need to mix the herb butter. In a small bowl add the butter, parsley, salt and pepper. Using your hands mix the seasoning together. Once combined, shape the butter into a sort of flattened potato shape/flat oval. Once done, wrap in Cling film or aluminium foil and place in the fridge to harden again for around 30-45mins. (Tip: The butter can be stored in the fridge for up to a day. I recommend preparing the herb butter the day before cooking, if you want to save some time).
Flattening the chicken
Using a meat hammer or something equivalent, beat the chicken breasts until they have flattened slightly. Remember chicken is much easier to tear with a meat hammer, so slow and steady will win this one. The idea is more to evenly flatten the chicken for rolling, rather than obliterate its thickness. That being said, your ideally aiming for 1cm/ third (1/3) of an inch for each breast. Try to ensure they are all relatively the same thickness and don’t worry if its thinner or thicker slightly.
Adding the filling
Now its time to bring the herb butter out of the fridge and cut it lengthwise into 4 pieces. To create 4 long and chubby butter strips. If your a cheese lover like myself, at this point i recommend preparing some mozzarella sticks or grated cheese.
Place one chubby stick of the herb butter (and/or mozzarella) in each of the flattened chicken fillets. Ensuring the butter doesn’t stick out of the sides of the chicken (otherwise it will leak out during frying). If needs be trim the butter to ensure the chicken will surround it on all sides once rolled up. If the ends of the chicken are too open when rolled, use food safe cocktail sticks to seal it more.
Coating the chicken
After the chicken is rolled and ready, its time to add the coating. I’ve made a easy step table (below) to keep an eye on while you do it.
| Step 1: Cover in flour Step 2: Cover in egg Step 3: Cover in breadcrumbs Step 4: Cover in egg again Step 5: Cover in breadcrumbs again Step 6: Set aside and do the next Chicken roll, until no more remain |
Frying
I recommend frying the rolls one at a time in a small but deep pot if you have one. The ideal situation is the entire chicken roll will be submerged once you drop it in the oil (this will help seal it and prevent the butter and/or cheese from leaking). You can also use a deep fat fryer if you have one.
Heat the oil to no higher than 180 degrees Celsius if you have a thermometer. If not then allow the pot to heat for 10-15 minutes on medium-high heat. To test, drop a few breadcrumbs in. If they begin to fry instantly and violently then the oil is ready.
Using metal tongs or something equivalent (not plastic or silicon). Lift the now breaded chicken roll and place into the pre-heated oil. If your chicken fillets are larger than 150g(5oz) then you can use the below calculation to adjust the cooking time.
Estimating Frying times
| Important: the below timing is based on chicken fillets that have reached room temperature! Metric Calculation: Cooking time of chicken fillet per 1 gram, in fully heated oil is 4.8 seconds (or 2 minutes per 25g). 100g per fillet = around 8 minutes 150g per fillet = around 12 minutes 200g per fillet = around 16 minutes 225g per fillet = around 18 minutes 250g per fillet = around 20 minutes Imperial Calculation Cooking time of chicken fillet per ounce, in fully heated oil is 136 seconds (2mins 16 seconds) or 68 seconds (1 minute 8 seconds) per half ounce 4oz per fillet = around 9 minutes 5oz per fillet = around 11 minutes 20 seconds 6oz per fillet = around 13 minutes 35 seconds 7oz per fillet = around 15 minutes 52 seconds 8oz per fillet = around 18 minutes 10 seconds 9oz per fillet = around 20 minutes 25 seconds |
If you’re worried the a few chicken Devolay’s aren’t fully cooked through but the outside is a dark brown then I suggest placing them in the oven for a further 10-15 minutes at 180 degrees Celsius
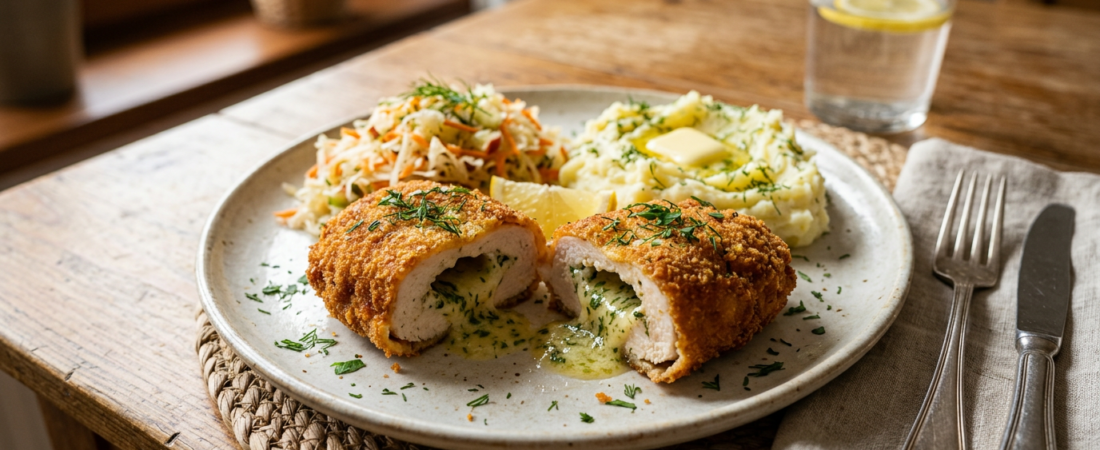
Serving
Devolay is best served immediately. However, if your wanting to serve all portions at once then I recommend placing the finished ones in a warm oven (around 70 degrees Celsius) while you fry the remaining cutlets. This will ensure the correct spillage effect when they are cut into.
Storage
I don’t recommend storing Devolay as they can be tricky to properly re-heat without burning. However, if necessary store in the refrigerator, within an hour of cooking for no longer than 1 day in a food safe container.